

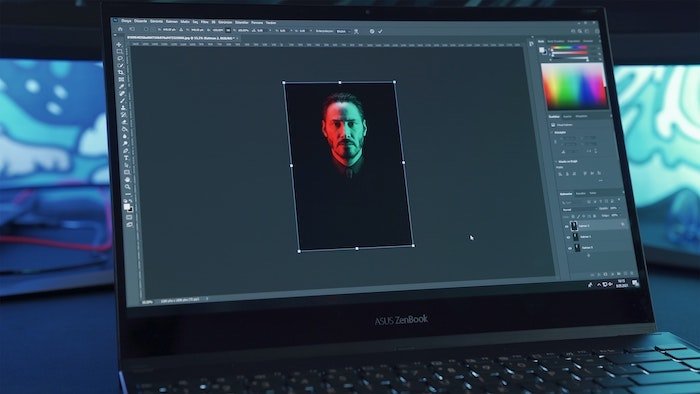
How To Remove A Face In Photoshop
Knowing how to practice a face swap in Photoshop is convenient for every photographer. You can use this technique to ready closed optics or merely swap heads for fun. This tool is as well useful if you lot own an e-commerce business and want to add together diverseness to your product photos.
Either way, here is an easy fashion to swap faces in Photoshop.


Will a Face Swap Work for Your Pictures?
Whether a face swap will look good depends on a few factors. The most important ones are the positioning of the caput and lighting.
The position of the head you desire to replace has to be similar to the caput you are going to copy. This will become you the virtually natural result. Y'all tin curve and distort a flat surface in Adobe Photoshop, but that doesn't piece of work for a human face.
It won't look natural anymore once you have to bend and twist a face to arrive fit. No amount of retouching will help that.
As well, the calorie-free on both faces has to be similar. Putting the caput or the face up of a person in direct sunlight on the body of a person in the shade is very difficult.
It is incommunicable to make the image look natural when the departure is also large.
If you wish to create a confront swap, Photoshop will exist your best choice. Something like this is not easy or possible with Adobe Lightroom.
Keep it simple when you attempt to supplant a face for the first time. Discover photos with faces that have about the same position and lighting. The all-time way to start is to use 2 most identical photos.
I volition bandy heads between 2 photos with the aforementioned evening low-cal in this case.
How to Make a Face Swap in Photoshop: Step-by-Stride
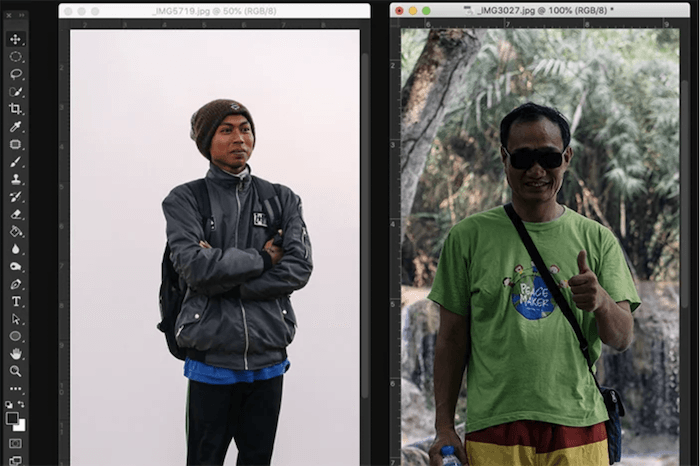
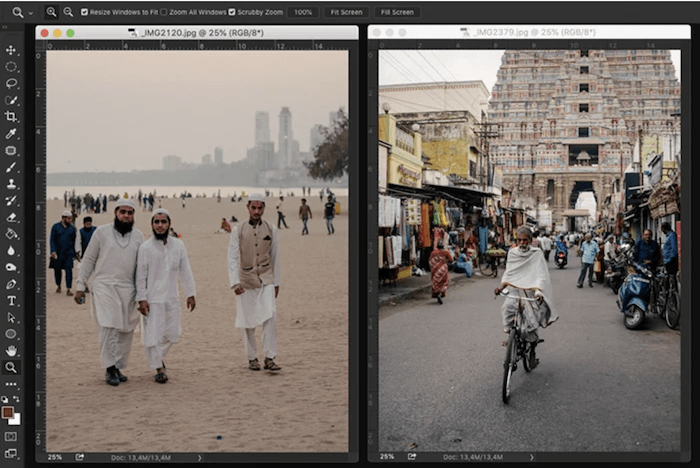
Step 1: Open up Both Photos in Photoshop
Open the photos and put them next to each other. Zoom in on the image from which you volition copy the face and head.
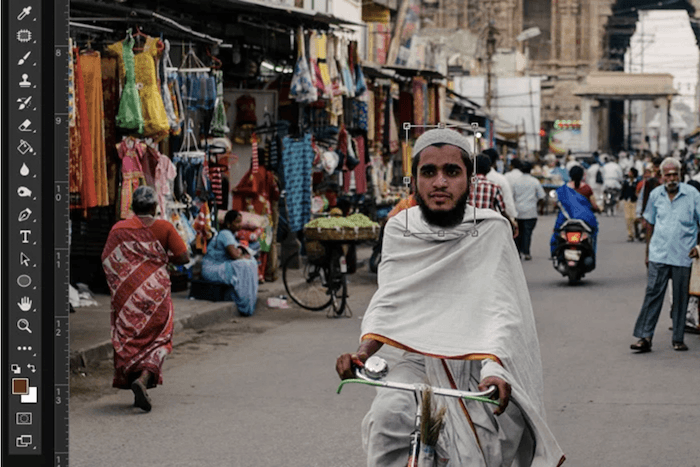
I will supervene upon the confront of the man on the bicycle with the face up of the homo in the eye.
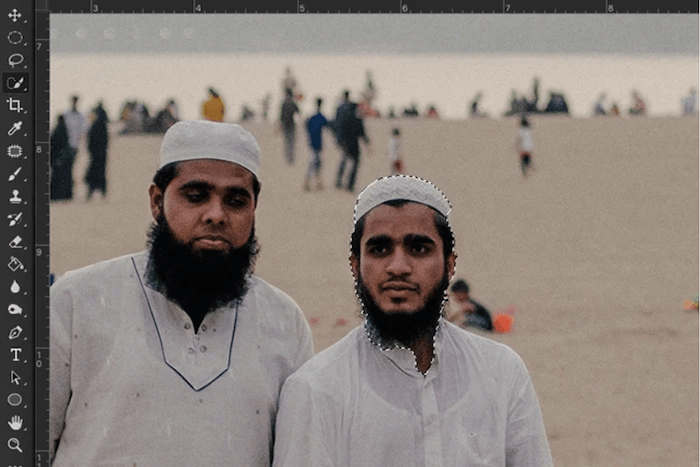
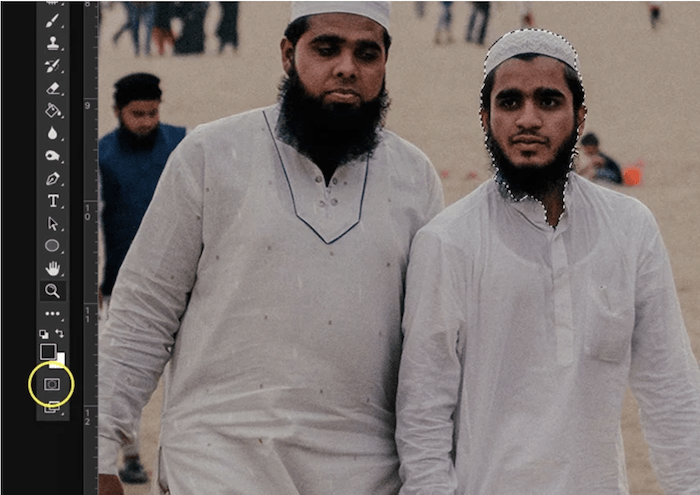
Stride 2: Select the Face up You Want to Swap Into Your Image
Start making a selection using the Quick Selection tool. The shortcut is West. It doesn't take to be perfect yet, and you lot can utilise other selection tools too.
At that place is some other style to practise this stride, merely it involves the Lasso tool and the Move tool.
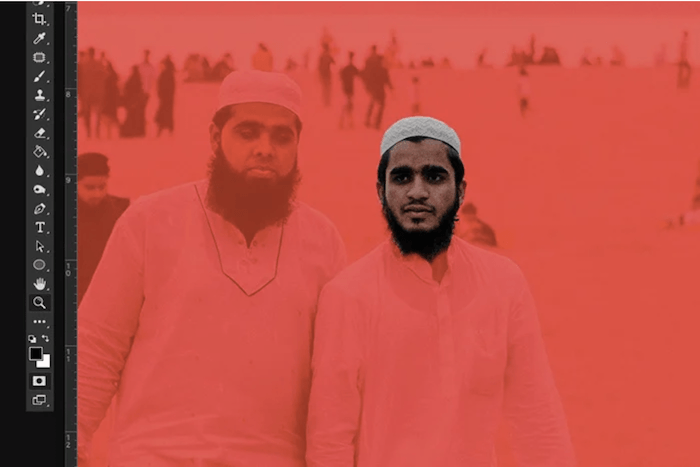
Stride iii: Improve the Choice With a Mask
Click on the Quick Mask button on the left menu to create a mask. Or you can likewise do it from the Layers console. After that, use the Brush tool to improve the pick, now shown as a red layer mask. Painting with white adds pixels, and painting with blackness removes pixels from the selection.
You can switch between black and white using the shortcut X. This is one of the best Photoshop tips to know in general.
Pace 4: Re-create and Replace the Face up in the 2d Photo
Click the Quick Mask push button once again in one case your pick is finished. This will take you lot back to standard mode editing.
Copy and paste the confront layer on the background layer. Cmd + C and Cmd + V for Mac OS and Ctrl + C and Ctrl + Five for Windows.
Position the face layer to supercede the original head. At present you have a new face as a new layer mask. You now take one of the worlds most unique models, as the head and body are from two different people.
Thankfully you thought about the skin tones, and then the head swapping doesn't stick out also much.

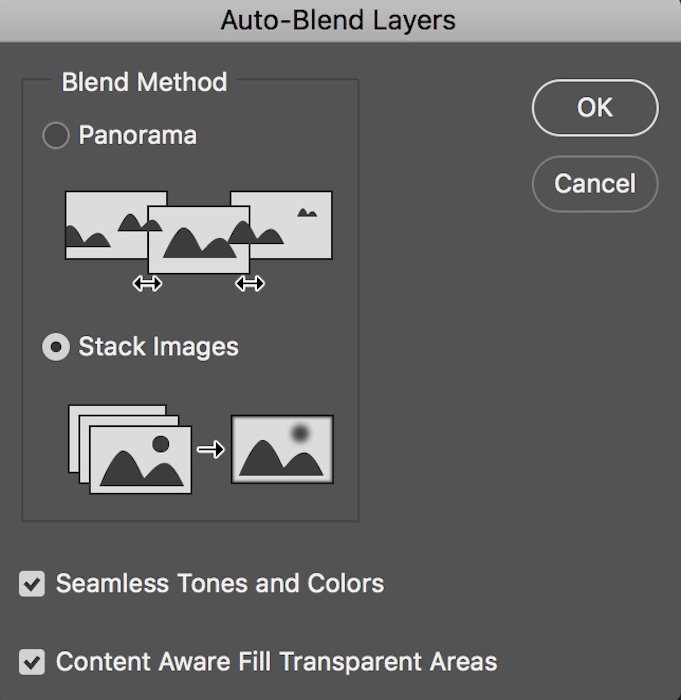
Step 5: Apply' Auto-Alloy Layers' if Necessary
If the skin tones from both subjects are different, you can employ the Auto-Blend Layers option. This tool works by blending the background layer with the confront layer. Go to 'Edit' in the Photoshop carte du jour to choose this option. So, select Machine-Blend Layers. Make sure you tick off the 'seamless tones and colours option.
Step six: Brand Final Adjustments to the Face Swap
In this case, the face layer already looked proficient, but I fabricated a few modest adjustments. I erased some areas from the bristles with a soft castor and fabricated the head smaller for a perfect fit.
Employ Cmd + T for Mac OS to resize the layer. Ctrl + T for Windows.
Sometimes it helps to add shadow to the face up layer when the lighting in both pictures is different. You can select 'Layer Effects' on the layers panel. And then, select the pick to create a drib shadow.
And there you have information technology. A perfect face swap!

Conclusion
At present you can ready airtight optics and brand a face swap in Photoshop for fun. Pay attention to the lighting and position of the caput before starting to swap faces. You want the result to expect natural.
In this example, I likewise used the masking technique. This technique is essential when learning how to edit photos in Photoshop. Information technology is convenient for a dozen different things and is one of the most of import techniques to learn.
Practice this technique when swapping faces in Photoshop and master it. You volition use it in about all hereafter projects.
Try out our Effortless Editing course to master all the secrets of professional editing in Lightroom.
Source: https://expertphotography.com/replace-a-face-in-photoshop/
Posted by: durkinsuan1959.blogspot.com
0 Response to "How To Remove A Face In Photoshop"
Post a Comment